- Home
- 1-Wire Weather Station
GuideWeather
Build a 1-Wire weather station: rain gauge, wind speed and direction
A DIY rain gauge, an anemometer, a wind vane and a few temperature probes can share one pair of wires. This guide explains how each instrument turns weather into something a 1-Wire chip can count or measure, and how a serial interface such as the TEMP08 or TEMP05 collects the readings into one tidy log.

- What a 1-Wire weather station is made of
- The rain gauge: tipping bucket and DS2423 counter
- Measuring wind speed with an anemometer and counter
- Reading wind direction: reed switches or DS2450 voltages
- Temperature and humidity on the same 1-Wire weather station bus
- Logging with a TEMP08 or TEMP05 serial interface
What a 1-Wire weather station is made of
A diy rain gauge is usually the first outdoor sensor people add, because it is simple: a small bucket tips, a magnet swings past a reed switch, and a counter chip remembers how many times that happened. The rest of a 1-Wire weather station follows the same idea. Every instrument is reduced to a count, a voltage or a temperature, and each of those values lives inside a small Dallas Semiconductor (later Maxim, now Analog Devices) chip with its own 64-bit serial number.
Because every chip is addressed by serial number, all of them can hang on the same twisted pair. A bus master polls each device in turn, so a weather station with rain gauge, anemometer, wind vane, humidity sensor and several thermometers still uses only one data line and a ground. The original Dallas One Wire Weather Station (OWWS) packaged the wind instruments and an outdoor thermometer on a single mast; AAG, a Mexican company, later built compatible versions.
The building blocks
- Counters (DS2423) for anything that produces pulses: rain tips, anemometer turns, lightning strikes.
- A/D converters (DS2450, or the DS2438) for anything that produces a voltage: a resistor-network wind vane, a humidity element, a barometric pressure sensor.
- Thermometers (DS18S20, DS18B20, DS1822) for air, soil or enclosure temperature.
A host computer could drive these chips directly, but 1-Wire timing is strict. Midon Design's serial kits took over that timing and sent finished text lines to the PC instead.
The rain gauge: tipping bucket and DS2423 counter
A tipping-bucket rain gauge funnels rain into a small seesaw with two cups. When one cup fills to a set volume, its weight tips the seesaw, the water spills out, and the other cup moves under the funnel. Each tip moves a magnet past a reed switch, which closes for a moment. The rain gauge therefore reports rainfall as a stream of switch closures, and each closure stands for a fixed depth of rain that the gauge maker states in the documentation.
The 1-Wire side is a DS2423, a 1-Wire counter with 4 kbit of memory and two external counter inputs. The reed switch pulls one input low on every tip and the chip increments a 32-bit count. The counter never resets on its own, so the host keeps the previous reading, subtracts, and multiplies the difference by the depth per tip. That gives rainfall since the last poll; summing the results gives daily and storm totals.
Building a DIY rain gauge
A home-made funnel and bucket work as long as the tip volume is known. Calibrate by pouring a measured amount of water slowly through the funnel, counting tips, and dividing. Keep the funnel level, screen it against leaves, and mount it away from roofs and trees that shelter it from wind-blown rain. A DIY rain gauge that is not level will count wrongly no matter how good the electronics are.
Measuring wind speed with an anemometer and counter
The cup anemometer on the Dallas and AAG masts works like the rain gauge: a magnet on the rotating shaft closes a reed switch as it turns, and a DS2423 counts the closures. The difference is that wind speed is a rate, not a total. The host reads the count twice, divides the difference by the elapsed time, and scales the result with the anemometer's calibration factor, which relates revolutions per second to miles per hour.
On a 1-Wire weather station the anemometer counter usually sits in the mast head, so only the bus cable runs down to the house. Short polling intervals catch gusts; long intervals give an average. TEMP05 output shows both in one line, for example a reading of 22 MPH with a gust of 35. TEMP05 reported wind speed only in miles per hour, and TEMP08 keeps all non-temperature outputs (wind speed, rain count, pressure) in imperial units, while temperatures can be shown in Fahrenheit or Celsius.
Why wind speed readings drift
- Worn bearings slow the cups, so low wind speed readings fall before high ones do.
- Nearby buildings create turbulence; a mast well above the roof line gives cleaner data.
- Missed polls make one interval look calm and the next one stormy, so steady polling matters.
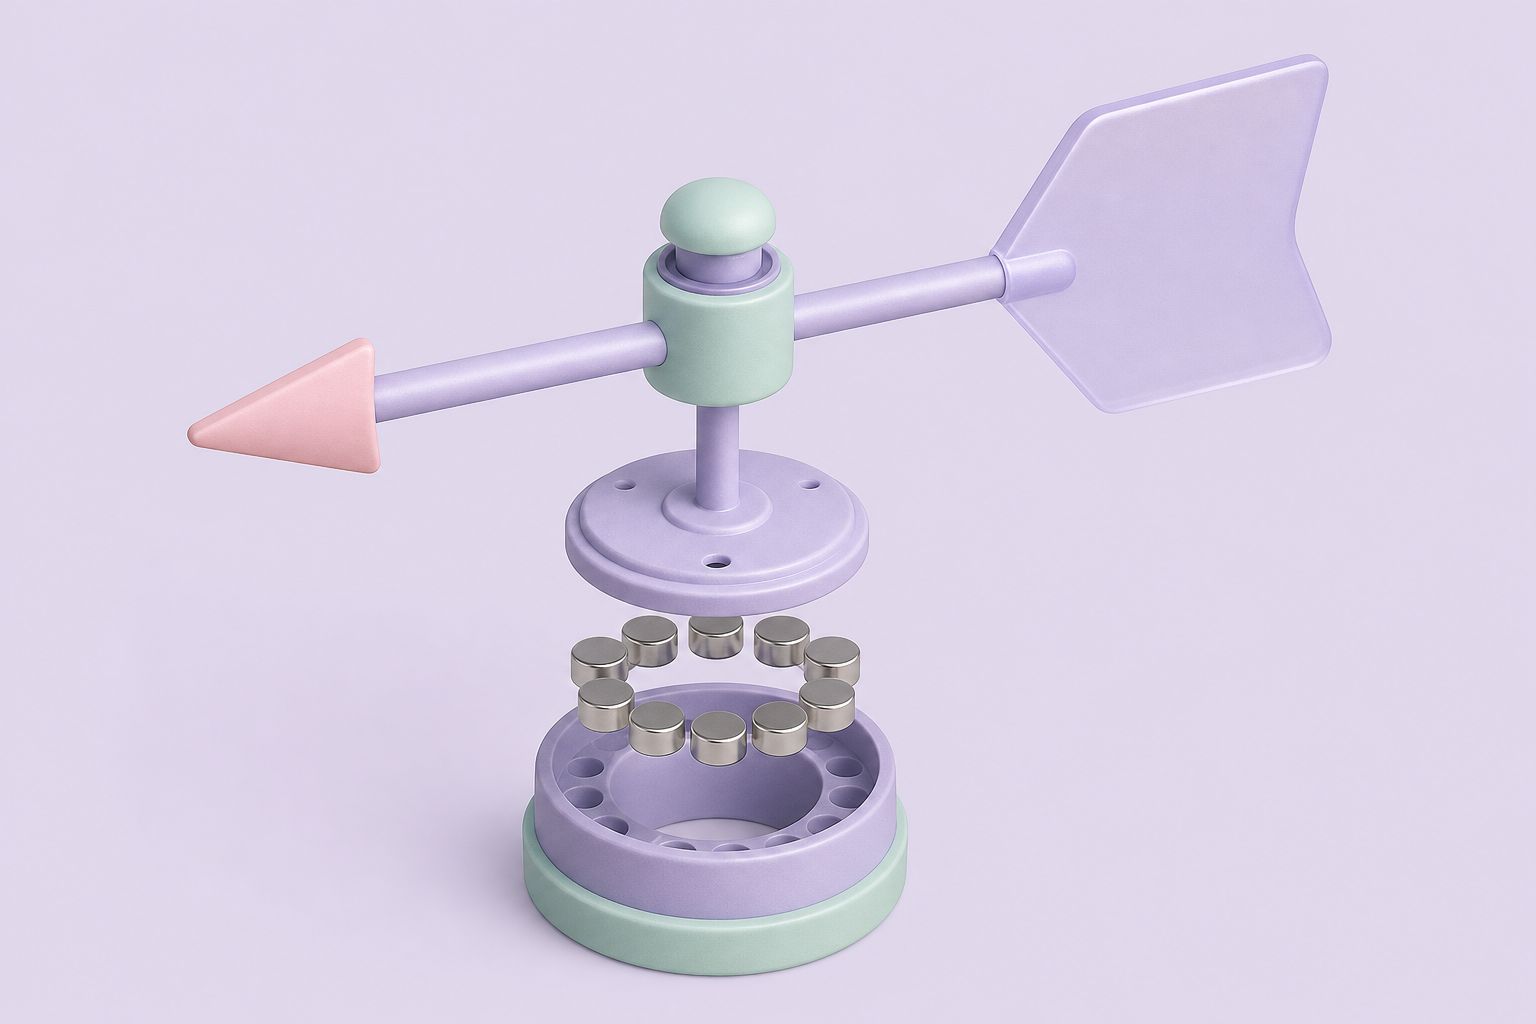
Reading wind direction: reed switches or DS2450 voltages
Two designs exist for wind direction on 1-Wire masts. The original Dallas station, and the electrically equivalent AAG Version 2, placed eight reed switches in a ring around the vane shaft, each paired with a DS2401 serial-number chip. A single magnet on the vane closes one switch, or two adjacent ones when it sits between them, so eight switches resolve sixteen compass points. The host works out wind direction from which serial numbers answer on the bus.
AAG's Version 3 station replaced the DS2401 ring with a DS2450 quad A/D converter. The switches now connect a resistor network, so each heading produces a distinct voltage, and the host maps that voltage to a compass point. It is simpler to wire and needs one chip instead of eight.
This matters for the interface. TEMP05 firmware version 4 worked with Version 1, 2 and 3 stations; from version 5 it dropped Version 1. TEMP08 supports the Version 3 station only. TEMP05 also had a NOR command that calibrates the wind direction sensor; if the thermometer holding that calibration was removed, the vane reported "???" until NOR was run again.

Temperature and humidity on the same 1-Wire weather station bus
The outdoor thermometer on the mast is usually a DS18S20 or DS18B20. Add more probes for the ground, a greenhouse or the attic. Humidity comes from a DS2438 reading a capacitive humidity element, covered in detail in the 1-Wire humidity sensor guide. The table lists what each instrument needs.
| Instrument | 1-Wire chip | Signal | Host calculation |
|---|---|---|---|
| Rain gauge | DS2423 counter | Reed switch, one pulse per tip | Count difference × depth per tip |
| Anemometer | DS2423 counter | Reed switch, pulses per turn | Counts per second × calibration factor |
| Wind vane (V1/V2) | 8 × DS2401 | Which IDs are present | Lookup to one of 16 points |
| Wind vane (V3) | DS2450 quad A/D | Resistor-network voltage | Voltage lookup to a heading |
| Thermometer | DS18S20 / DS18B20 | Digital temperature | None, read directly |
| Humidity | DS2438 | Element voltage and supply voltage | Ratio, then temperature correction |
Sunlight falling on a thermometer makes it read high. The TEMP05 FAQ recommends a ventilated radiation shield, often called a pagoda, for outdoor probes.
Logging with a TEMP08 or TEMP05 serial interface
The TEMP08 serial 1-Wire interface and its predecessor, the TEMP05, sit between the bus and a PC's RS232 port. They handle one weather station plus a mix of other sensors, up to 60 devices in total, and print a block of readings every 1 to 99 minutes at 9600 bps, 8 data bits, no parity, no flow control.
- Wire the bus. Run CAT-5 twisted pair from the interface to the mast, then tap the rain gauge and extra thermometers into the same run.
- Register the sensors. Issue INI from a terminal program so the interface finds each serial number and stores it in EEPROM.
- Identify each one. Connect sensors one at a time, run INI, and note the newest number in the DIS list.
- Set the poll interval and units. Pick Fahrenheit or Celsius and a poll time that suits your wind speed averaging.
- Read the lines. Home automation software such as HomeSeer, or any program that reads a serial port, parses lines like Wind Dirn = WNW and turns them into logs, graphs or alarms.
The TEMP05 FAQ collects the common faults, such as readings that turn into "???" after a sensor is added on a new star branch. A weather station with rain gauge and wind instruments on a long cable is the setup most likely to show that problem, so plan the wiring before the mast goes up.
Once the lines arrive reliably, a 1-Wire weather station needs little attention: clean the funnel, check the vane turns freely, and compare the thermometer with a trusted reference now and then. The network wiring guide covers cable choice and topology in more depth.
Further reading: DS2438 smart battery monitor (Analog Devices) · DS18B20 digital thermometer (Analog Devices) · OWFS 1-Wire file system
Questions and answers
What sensors does a basic 1-wire weather station need?
A useful starting set is a DS2423 counter for the rain gauge, a second DS2423 input or chip for the anemometer, a wind vane read either by eight DS2401 chips or by a DS2450 A/D converter, and one or more DS18S20 or DS18B20 thermometers. A DS2438 humidity sensor can be added later on the same bus.
How does a 1-wire weather station turn rain gauge tips into rainfall?
Each tip of the bucket closes a reed switch once and the DS2423 adds one to its count. The host stores the previous count, subtracts it from the new one, and multiplies the difference by the depth of rain that one tip represents. The counter keeps running, so no reading is lost between polls.
Can a DIY rain gauge be as accurate as a commercial one?
It can be close if the tip volume is calibrated. Pour a measured amount of water slowly through the funnel, count the tips and work out the depth per tip. Keep the gauge level, clear of overhanging roofs or trees, and screened against debris, since those errors are larger than any electronic error.
Which weather station versions does the TEMP08 support?
TEMP08 supports the AAG Version 3 station, which uses a DS2450 for wind direction. It does not support the original Dallas Version 1 or the AAG Version 2. TEMP05 firmware version 4 handled all three, while TEMP05 version 5 and later dropped support for Version 1.
Why does my wind direction reading show question marks?
On TEMP05 firmware 4.19 and later, the NOR calibration for the wind vane is stored in the EEPROM of one thermometer. If that sensor was removed, or the sensor list was erased and rebuilt, the calibration is lost and the vane reads as invalid. Running NOR again normally clears it.
Related pages
TEMP08 Serial One Wire Interface
TEMP08 linked a PC serial port to the 1-Wire bus: up to 60 sensors for temperature, humidity, rain, wind and relays, plus a real-time clock and RJ-12 jack.
TEMP05 Introduction
TEMP05 was a serial 1-Wire interface for a weather station and up to 20 DS18S20 thermometers, later 60 devices.
TEMP05 Frequently Asked Questions
Answers for TEMP05 owners: parasitic power, sensor wiring and range, identifying sensors, firmware support, weather station versions and RJ11/RJ12 pinouts.
1-Wire Humidity Sensor
How a 1-Wire humidity sensor works: the DS2438 circuit with an HIH-4000 element, temperature compensation, realistic accuracy limits and good placement.
1-Wire Network Wiring
1-Wire network wiring explained: linear bus versus star topology, CAT-5 pairs, cable length up to 300 ft, parasite power and RJ11 and RJ12 jack pinouts.